terra-os
 Fifhdvdy Lastname
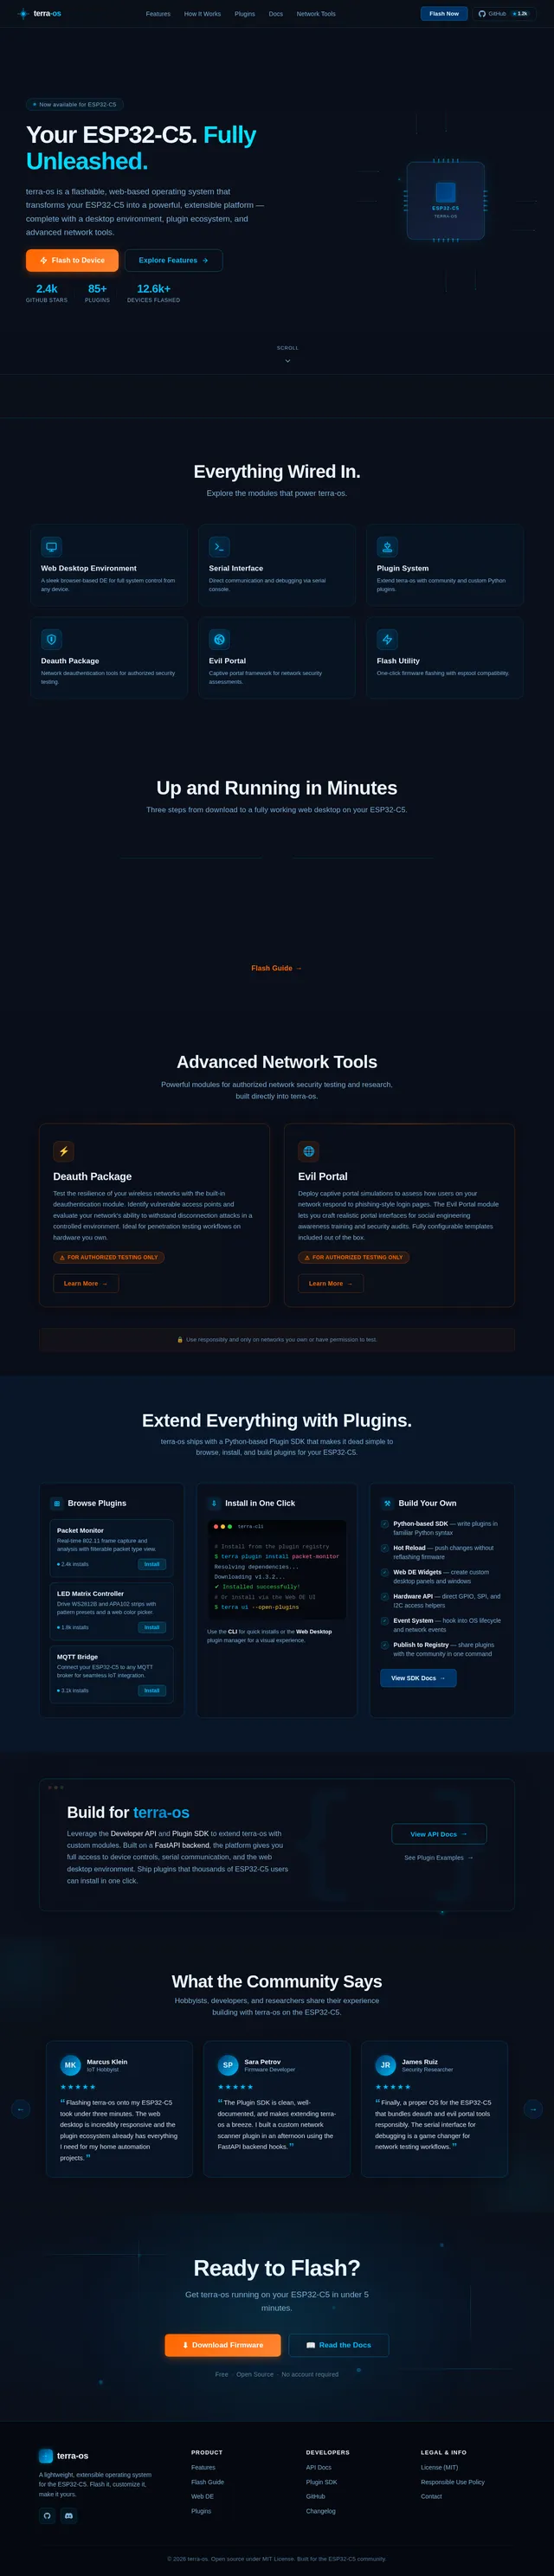
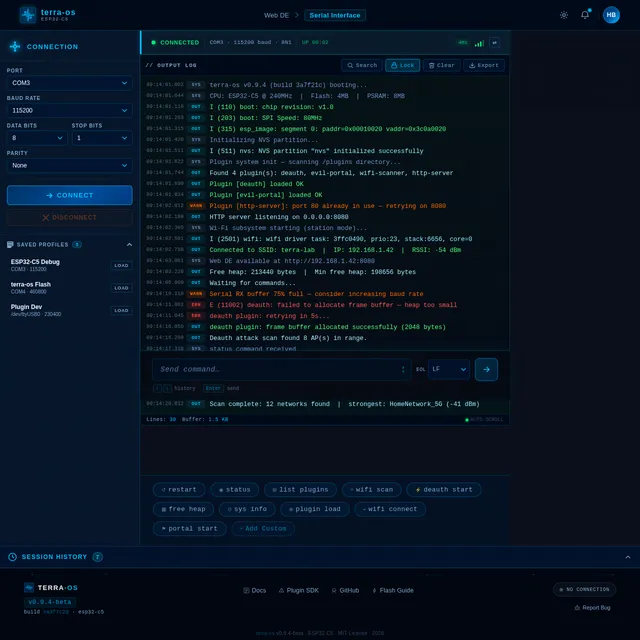
A super nice OS for my ESP32-C5 supporting a web DE/interface and serial interface, with deuathentication and evil portal functions, and a ton of other nice things.

Comments (0)
Sign in to leave a comment
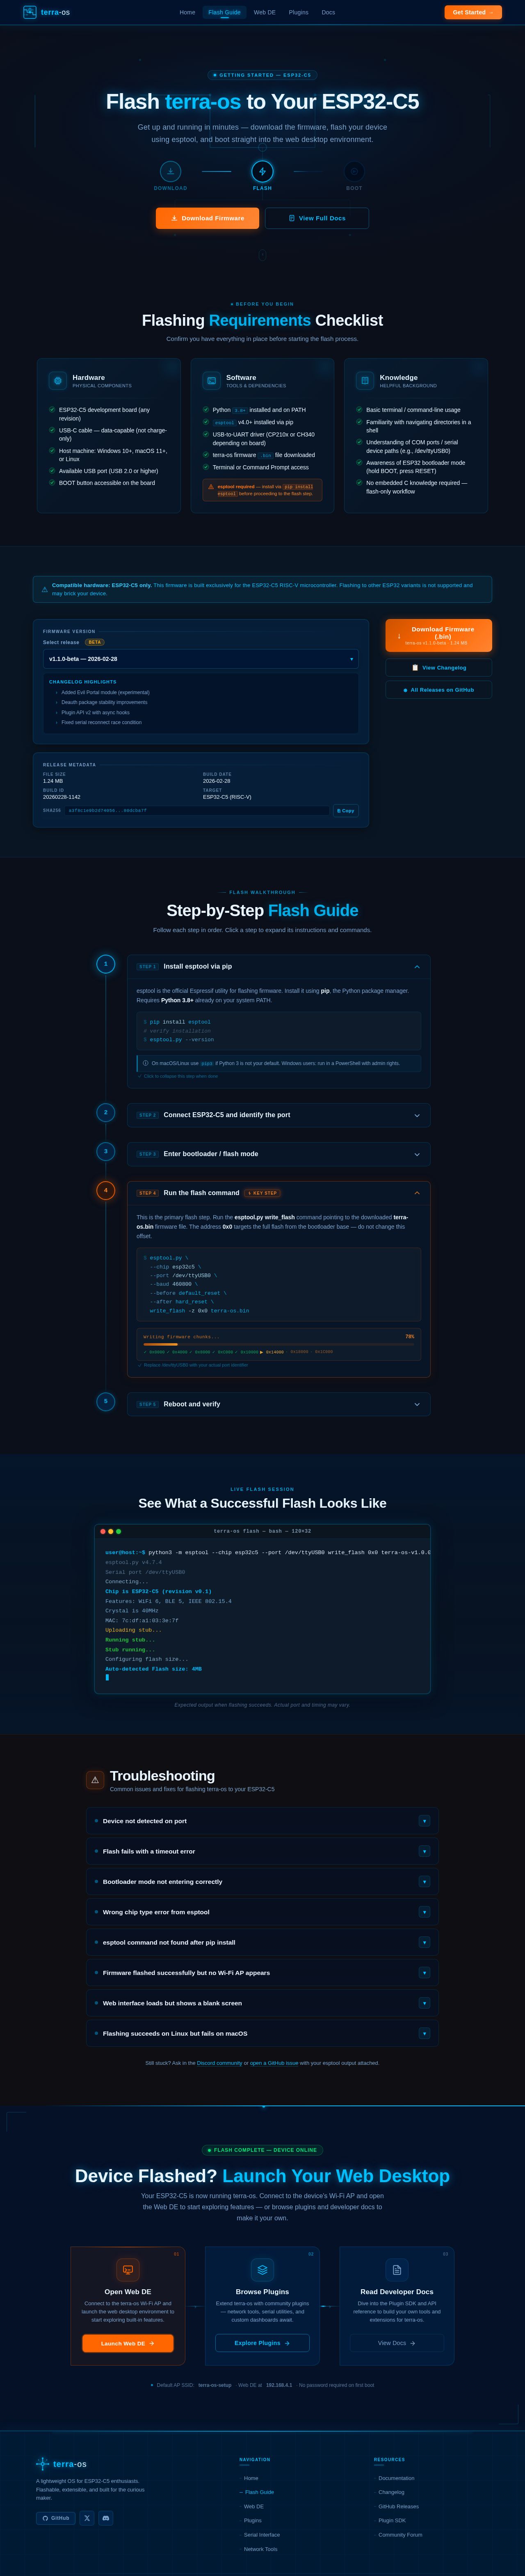
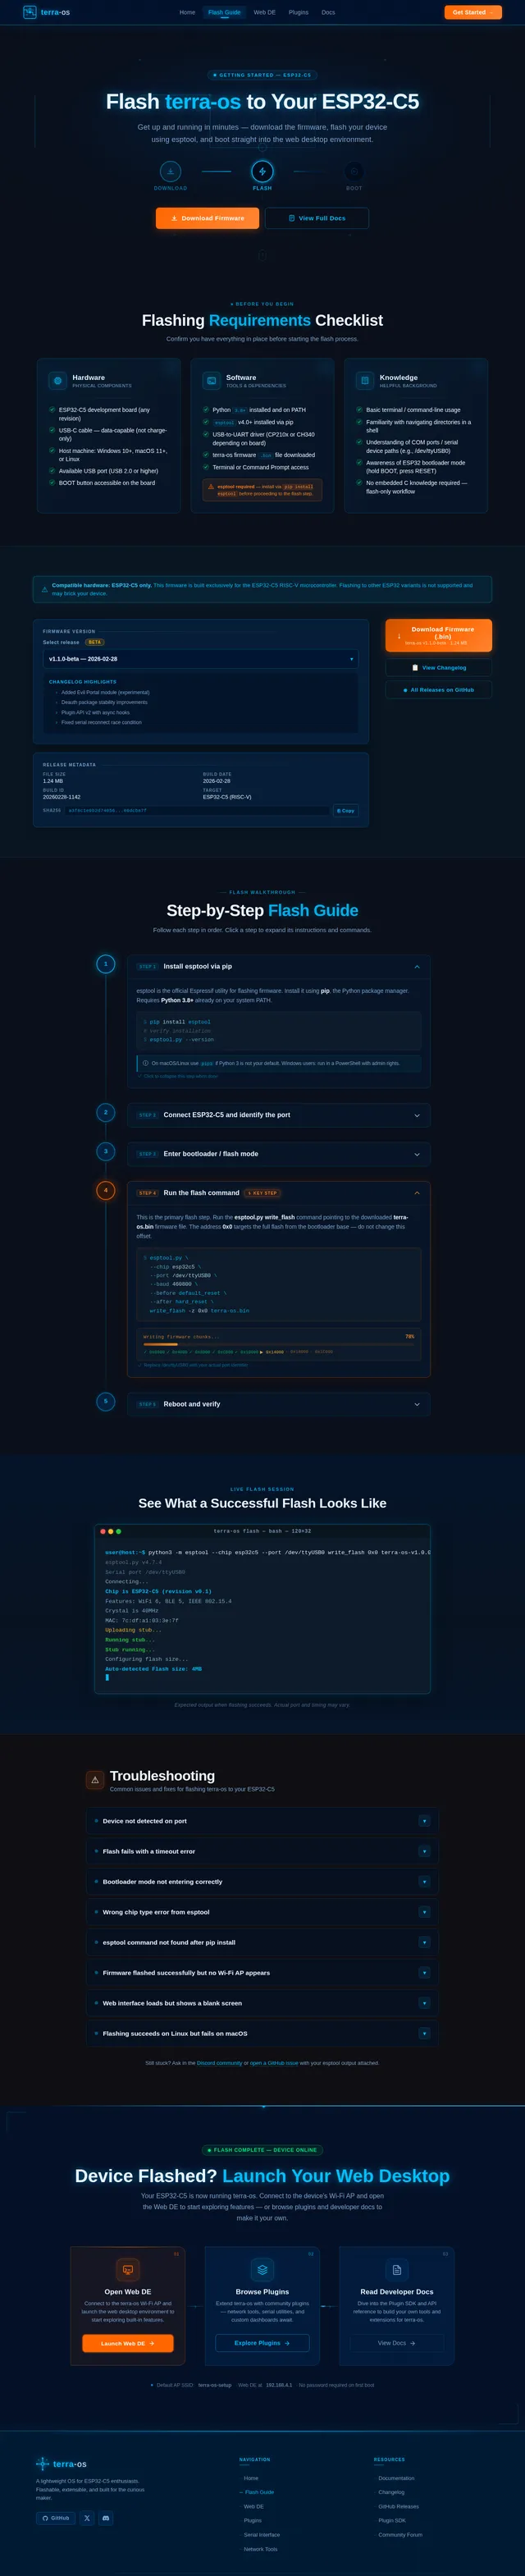
Flash terra-os to Your ESP32-C5
Get up and running in minutes — download the firmware, flash your device using esptool, and boot straight into the web desktop environment.
Flashing Requirements Checklist
Confirm you have everything in place before starting the flash process.
Hardware
Physical components- ESP32-C5 development board (any revision)
- USB-C cable — data-capable (not charge-only)
- Host machine: Windows 10+, macOS 11+, or Linux
- Available USB port (USB 2.0 or higher)
- BOOT button accessible on the board
Software
Tools & dependencies- Python 3.8+ installed and on PATH
- esptool v4.0+ installed via pip
- USB-to-UART driver (CP210x or CH340 depending on board)
- terra-os firmware .bin file downloaded
- Terminal or Command Prompt access
pip install esptool before proceeding to the flash step.Knowledge
Helpful background- Basic terminal / command-line usage
- Familiarity with navigating directories in a shell
- Understanding of COM ports / serial device paths (e.g., /dev/ttyUSB0)
- Awareness of ESP32 bootloader mode (hold BOOT, press RESET)
- No embedded C knowledge required — flash-only workflow
- Added Evil Portal module (experimental)
- Deauth package stability improvements
- Plugin API v2 with async hooks
- Fixed serial reconnect race condition
Step-by-Step Flash Guide
Follow each step in order. Click a step to expand its instructions and commands.
Connect ESP32-C5 and identify the port
Connect your ESP32-C5 to your host machine via USB-C. Identify the assigned serial port — on Linux/macOS it appears as /dev/ttyUSB0 or /dev/tty.SLAB_USBtoUART, on Windows as COM3 (or higher).
# Linux / macOS
$ ls /dev/tty*

# Windows (PowerShell)
> Get-WMIObject Win32_SerialPort | Select DeviceID,Description
CP210x or CH340 USB driver if your device is not detected. Refer to your board's datasheet to confirm the UART chip.Enter bootloader / flash mode
The ESP32-C5 must be in download mode to accept firmware. Hold the BOOT button, press and release RESET, then release BOOT. Alternatively, esptool can do this automatically via DTR/RTS.
# Verify device is in flash mode
$ esptool.py --port /dev/ttyUSB0 chip_id
Chip is ESP32-C5. If you see a timeout, re-enter bootloader mode and try again.Reboot and verify
After flashing completes, the device resets automatically. terra-os will boot, broadcasting a Wi-Fi access point named terra-os-XXXXXX. Connect to it from any browser and navigate to http://192.168.4.1 to open the Web DE.
# Monitor serial output after boot
$ esptool.py --port /dev/ttyUSB0 \
  monitor --baud 115200
[terra-os] Web DE ready in the serial output confirming a successful boot.See What a Successful Flash Looks Like
Expected output when flashing succeeds. Actual port and timing may vary.
Troubleshooting
Common issues and fixes for flashing terra-os to your ESP32-C5
If your ESP32-C5 is not showing up as a serial port, first check the USB-C cable — data-capable cables are required. Power-only cables will charge the board but will not expose a serial interface to your host machine.
Verify the device appears with the appropriate command for your OS:
Windows users: You may need to install the CP210x or CH340 USB-to-UART driver. Download from your board manufacturer's page and reboot after installation.
A timeout during flashing typically means esptool cannot communicate with the chip after connecting. The most common cause is that the ESP32-C5 is not in bootloader/download mode when the flash command runs.
Try lowering the baud rate to give the serial link more time to synchronise:
Tip: If the timeout persists, try a different USB port or a shorter USB cable. Long or low-quality cables introduce signal noise that can cause handshake failures.
The ESP32-C5 enters bootloader mode by holding the BOOT button while pressing and releasing RESET, then releasing BOOT. The sequence must be precise — releasing BOOT before the chip fully resets will cause it to boot normally instead of entering download mode.
Exact manual sequence:
Some boards with auto-reset circuitry (DTR/RTS lines) will enter bootloader mode automatically when esptool connects — no manual button press needed. Check your board's datasheet.
esptool will refuse to flash if it detects a chip family mismatch. The terra-os firmware image is compiled exclusively for ESP32-C5 and cannot run on ESP32, ESP32-S2, ESP32-S3, or ESP32-C3 variants.
Confirm your chip identity before flashing:
Do not override the chip check. Flashing incompatible firmware with --chip esp32c5 --no-check can brick your device and void any manufacturer warranty.
This happens when pip installs packages into a directory that is not on your system's PATH. The fix depends on your environment:
Recommended: Use a Python virtual environment (python3 -m venv .venv) to keep esptool isolated and avoid PATH conflicts with system Python packages.
After a successful flash, terra-os broadcasts a Wi-Fi access point named terra-os-XXXXXX (where XXXXXX is the last 6 digits of the device MAC address). If the AP does not appear within 15 seconds of boot, try the following:
Look for boot errors in the serial output. A partial flash (e.g., the bootloader wrote correctly but the application partition failed) will cause the device to reboot-loop silently.
Reboot-loop detected? Re-run the full flash command with the --erase-all flag to wipe the entire flash before writing. This clears any corrupted partition table from a previous partial flash.
A blank web interface at 192.168.4.1 usually means the frontend assets (HTML/CSS/JS) were not written to the SPIFFS/LittleFS partition, or the partition offsets in the flash command were incorrect.
The correct full flash command writes both the firmware and filesystem image:
Tip: The all-in-one terra-os-full.bin download from the Firmware page is pre-merged and can be flashed to 0x0 as a single file, eliminating partition offset errors entirely.
On macOS, USB serial devices appear as /dev/cu.usbserial-XXXX or /dev/cu.SLAB_USBtoUART — not /dev/ttyUSB0 as on Linux. Using the wrong device path is the most common macOS failure.
Additionally, macOS Ventura and later may require explicit permission to access serial devices. Check System Settings > Privacy & Security > Serial and ensure your terminal emulator is allowed.
Device Flashed? Launch Your Web Desktop
Your ESP32-C5 is now running terra-os. Connect to the device's Wi-Fi AP and open the Web DE to start exploring features — or browse plugins and developer docs to make it your own.
Open Web DE
Connect to the terra-os Wi-Fi AP and launch the web desktop environment to start exploring built-in features.
Browse Plugins
Extend terra-os with community plugins — network tools, serial utilities, and custom dashboards await.
Read Developer Docs
Dive into the Plugin SDK and API reference to build your own tools and extensions for terra-os.
Default AP SSID: terra-os-setup · Web DE at 192.168.4.1 · No password required on first boot
No comments yet. Be the first!